Edit: in Maya 2016 and up this workflow has been greatly simplified thanks to the UV > Contour Stretch command. The resulting UVs are very good even with default settings. I suggest to run an additional unfold command too, in order to get an even more regular distribution, as I explain in this section of the article.
It is expected that the textures follow the direction of the path, like we can se in these photos.
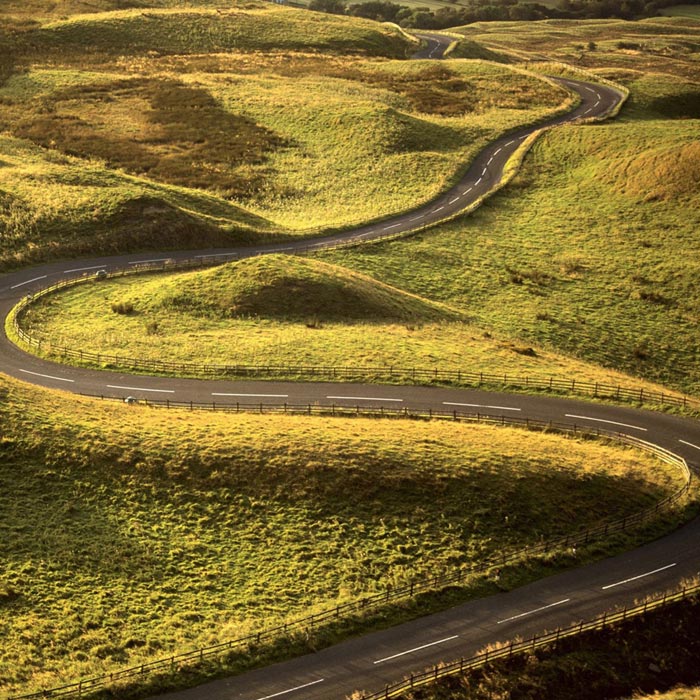
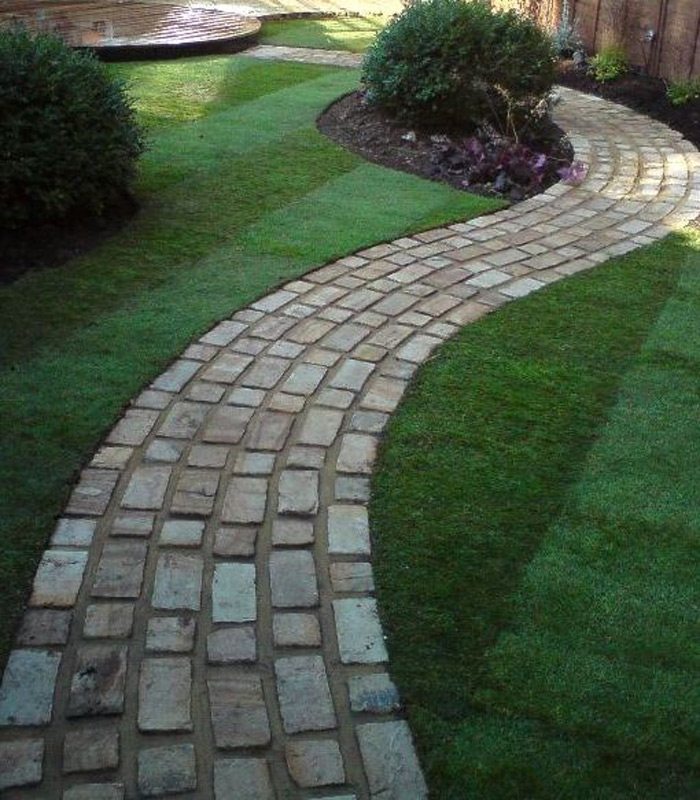
Example of how the texture should follow the path
Usually though, the textures have straight lines if they haven't been drawn and adapted for the specific geometry.
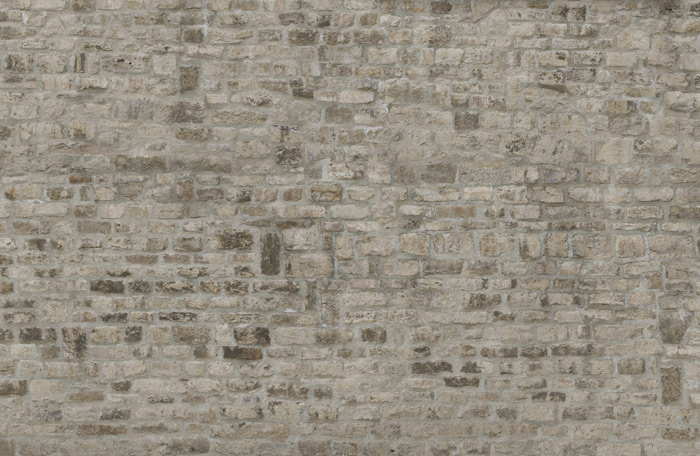
Example of a linear texture
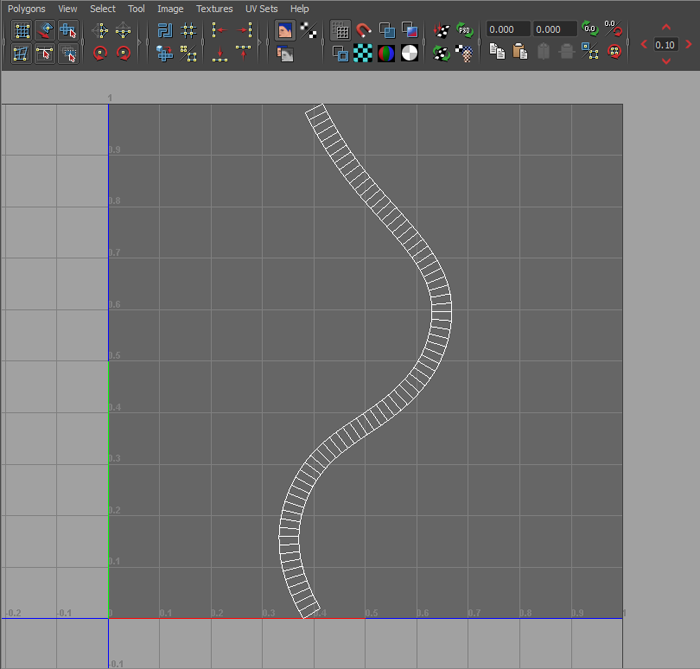
A simple planar projection won't work because at a certain point the texture will go straight, ignoring the path's curves.
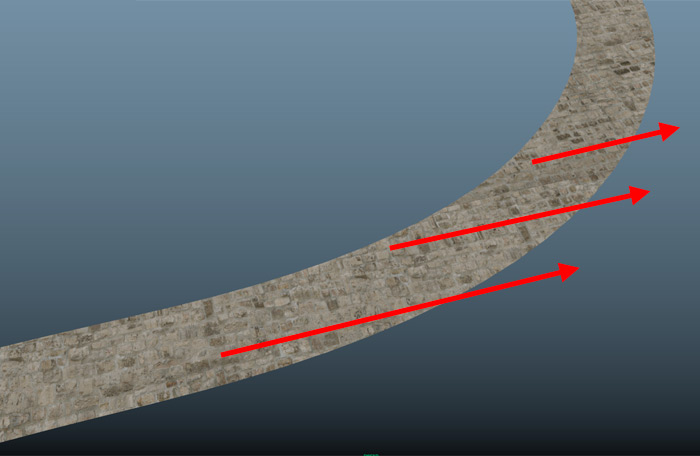
Example of planar projection on curved path
The best thing to do would be to draw or adapt manually the texture to the projection in photoshop, but in visualization we usually rely on UV projections.
You can, in a few steps lay the UV coordinates of the object in a way that they will adapt to the texture.
Here is how to proceed:
- apply a planar projection along the Y axis of the object;
The UVs should appear like this after the planar projection
- in the UV editor, select the UVs that are on both ends of the object, pull them away and align them vertically;
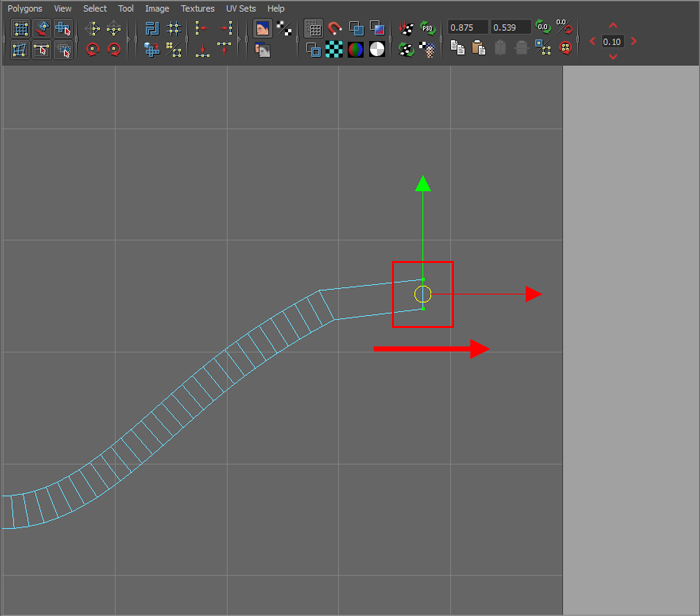
Pulling the UVs on the ends
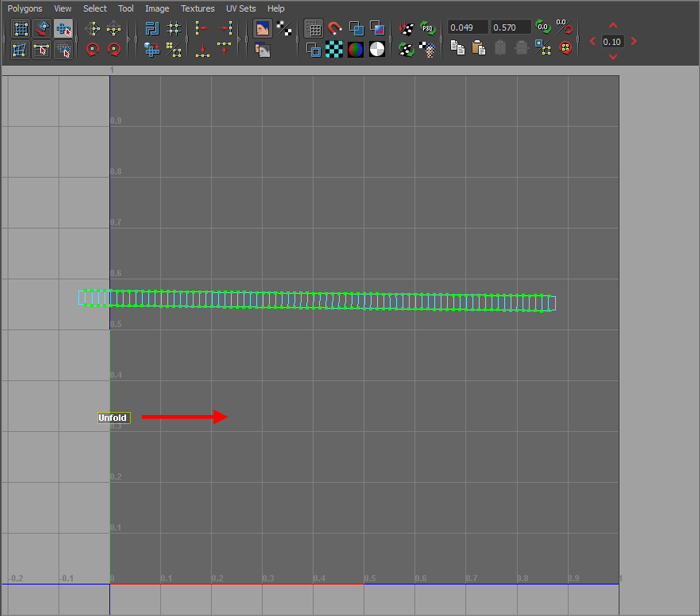
- Select all the UVs except those that we have just moved and press Unfold & Relax
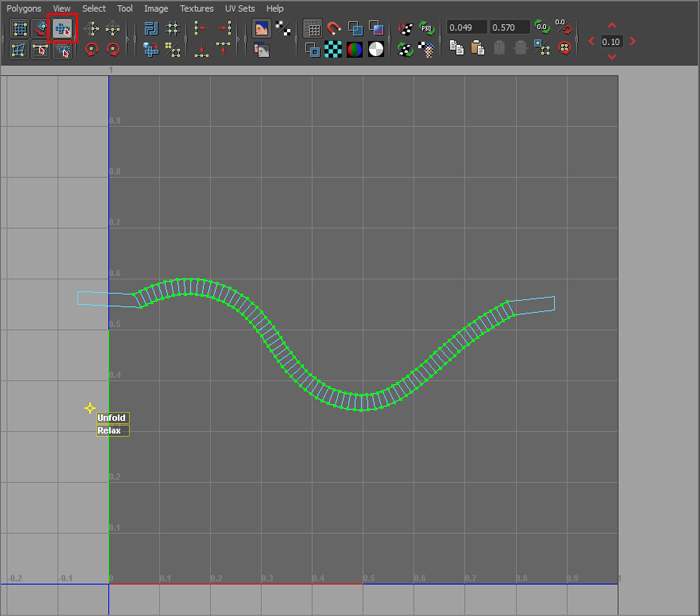
The Unfold & Relax tool
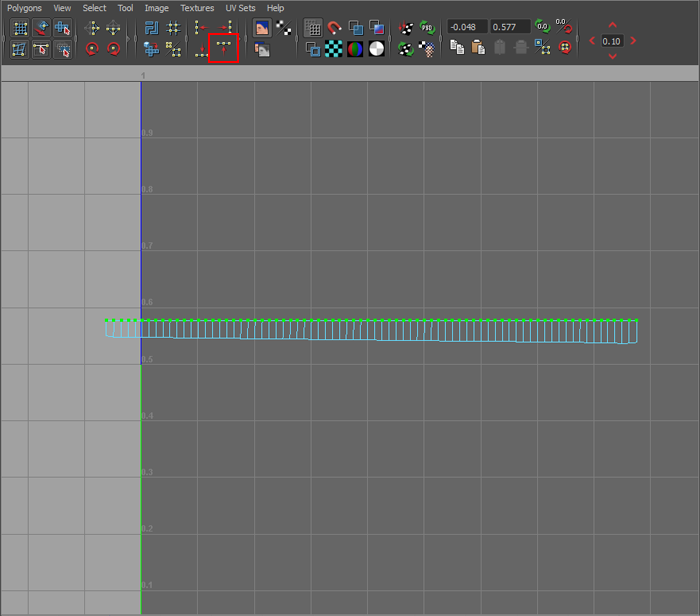
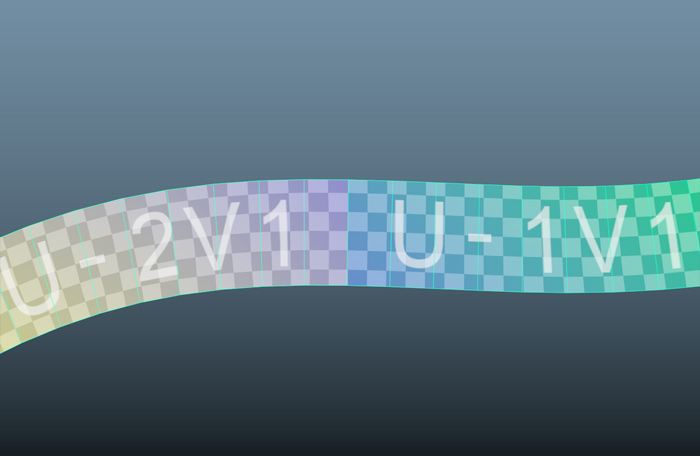
- pull the manipulator that appears on relax and then the one that appears on unfold until the distribution of the UVs is regular and the shape becomes a stretched rectangle;
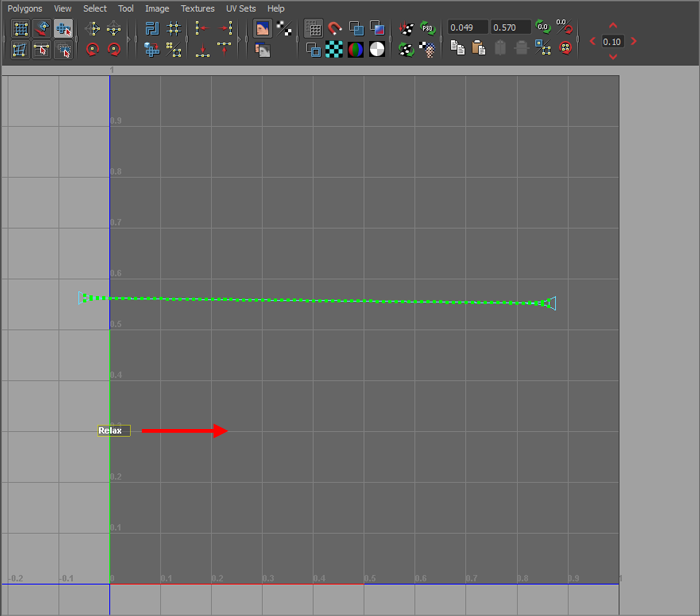
The effect of 'Relax' on the UVs
The effect of 'Unfold' on the UVs
- select the upper UVs and align them to the top with the specific button;
Alignment of the upper UVs
- repeat for the lower UVs, aligning them to the bottom;

Alignment of the lower UVs
At this point the coordinates should be quite regular, but to have the correct ratio between the faces based on their effective size in world space another unfold is necessary.
- select all the UVs and execute polygons > unfold > options;
- in the following window, select legacy (only in versions 2015+), deselect pin UV border and set unfold constraint to horizontal;
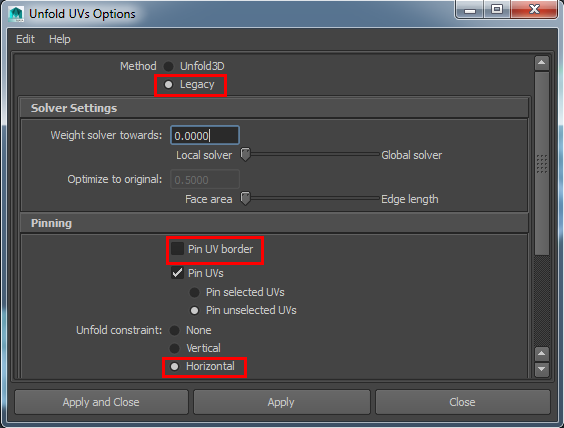
Window of the Unfold UV command with the options to set
This way the distribution of the UVs will be as regular as possible and there will not be deformations in the visualization of the texture.
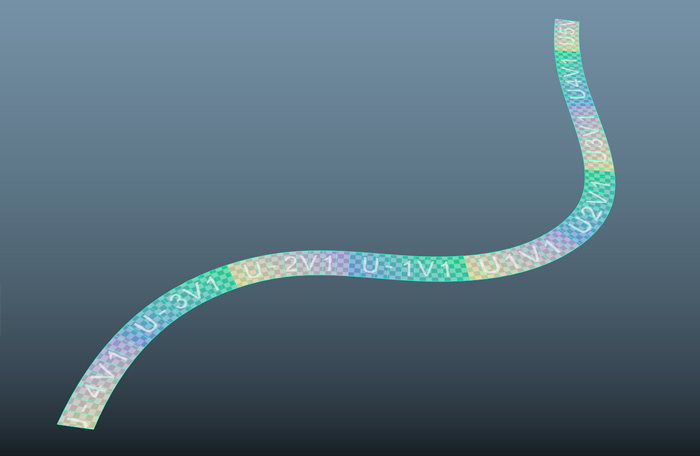
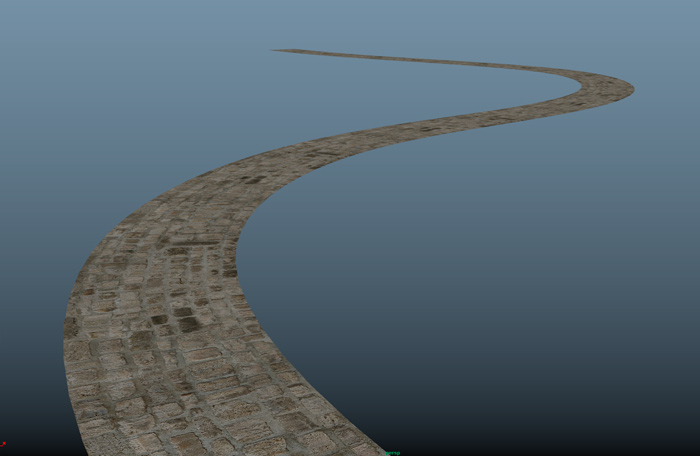
The texture now follows perfectly the path of the geometry
I hope this little trick will help you out with some of your projects.
See you next time.