What are the advantages of color editing directly in Maya instead of Photoshop for example?
First of all the comfort that comes from not having to switch between applications and the ability to see changes in real time, especially now that Viewport 2.0 supports the majority of the nodes in hypershade (Maya 2015+).
Another reason is that if, for example, we need two tones of the same texture, we can load the texture once and edit its output with color correction nodes, saving ram.
Let's get started.
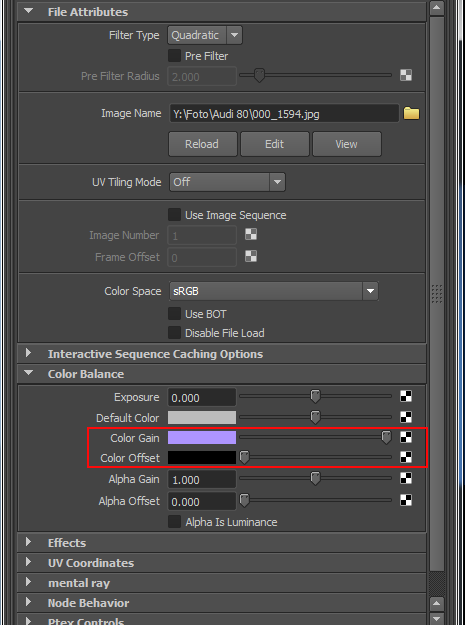
1. Color Gain, Color Offset
These attributes are present in every 2d and 3d texture, in the Color Balance section.
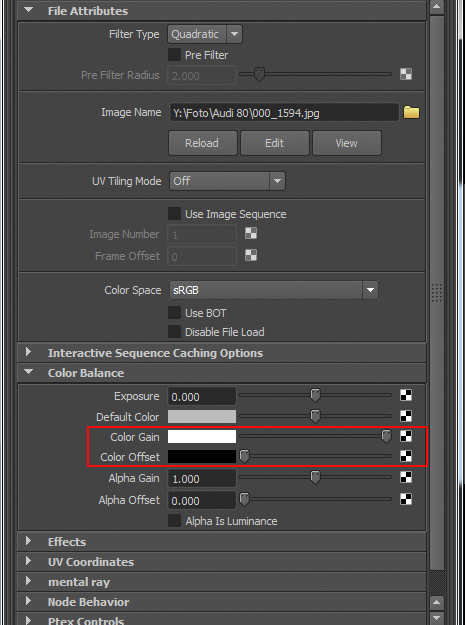
The attributes of Color Gain and Color Offset in the attribute editor
Color Gain acts as a multiplier of the color of the texture. Its most common use is to modify the intensity of our image. If instead of using it as a simple gain, we select a color, all the texture will get the tone of the selected color. In other words, the color of the texture gets multiplied by the color of the Color Gain.
The color gain set with a color
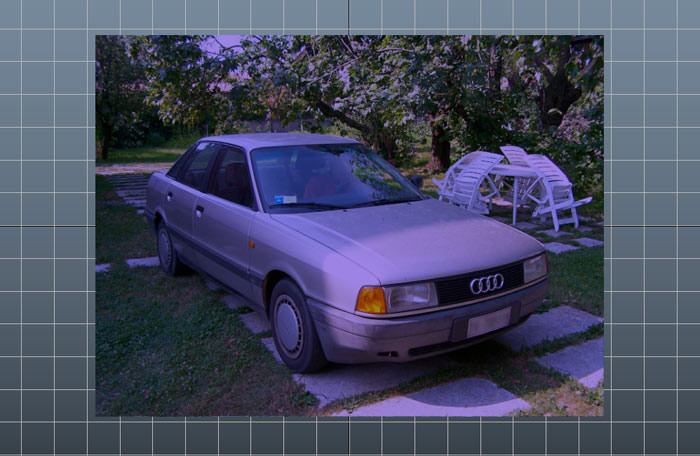
The effect of colored Color Gain on a texure
Color offset adds the selected color to the color of the texture, so when it is black, it won't have any effect, because black has value of 0; as we select a lighter color, the image will become more and more washed-out. If we select a color, the texture will get its tone.

The Color Offset attribute used to color a texture
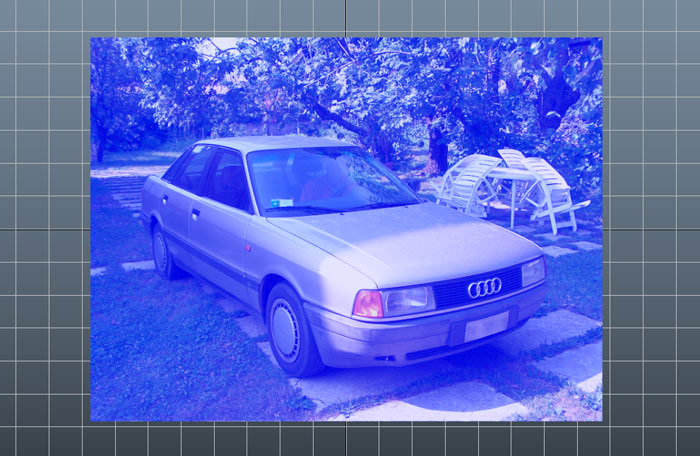
The effect of colored Color Offset on a texture
A trick that I often use in case I have to limit the contrast of a texture is to lower the Color Gain and raise the Color Offset.
If we do the opposite, raise the gain above 1.0 and lower the offset under 0.0, the contrast will increase. But be careful because you might be giving values over 1.0 in some areas of your image, which is not physically accurate.
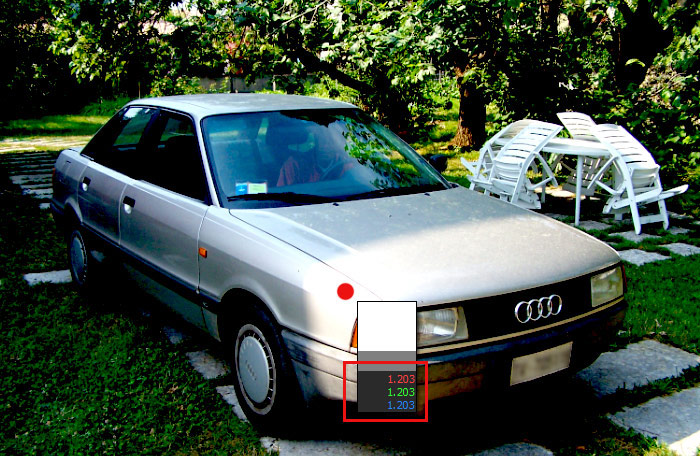
In this image you can see that contrast generated incorrect values, above 1.0
One thing to keep in mind if you are using maya 2015 ext 1 or higher and your Color Management is active with the Show Color Managed Pots option on, is that the management of the intensity of these attributes is non-linear so you will have to trust your perception of the color, not its numerical value.
2. Color Remap with ramp
With this method we map the texture's intensity to a ramp node.
In the Effects section of each texture you can create a Color Remap by pushing the Insert button.
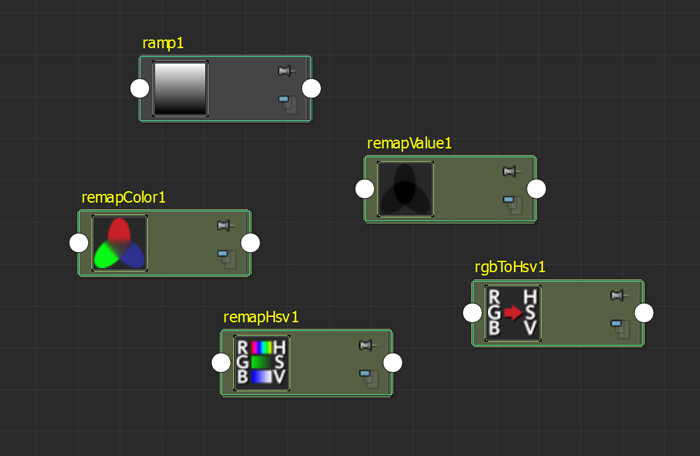
The following network is created:
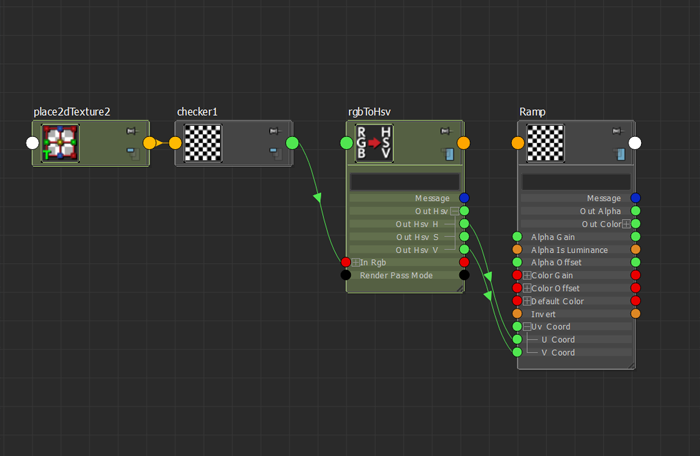
Image of the network created by Color Remap
The texture goes through an rgbToHsv that connects outHsvH and outHsvV (hue and value of the image) to uCoord and vCoord (UV coordinates) of the ramp.
This allows us to remap to our liking the color and luminance of the texture using the colors of the ramp. The darker values of our image are associated to the color on the left of the ramp, the lighter ones with the one on the right.
A practical example: if I want to make a black and white version of the image, I just need to set the ramp with black on the left and white on the right. And if I want to raise the contrast, I will have to bring the two colors closer to each other.
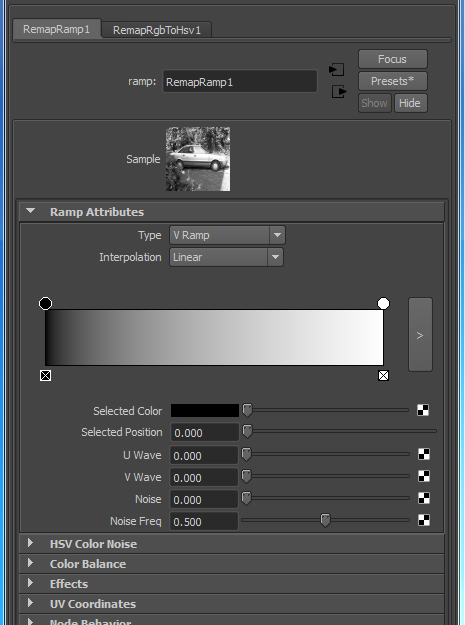
The ramp that controls the remapping

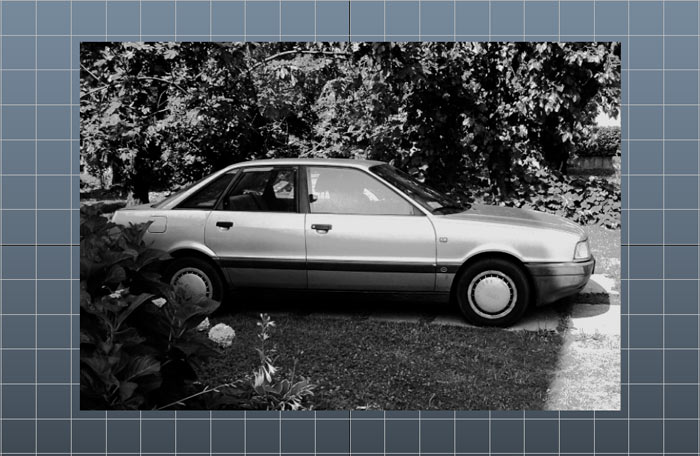
The texture, converted in black and white with color remapping
To change the gamma I'll have to click in the center of the ramp to create a medium value and move it to the right or to the left. If I want to invert the values, I'll have to swap the position of the colors.

Editing of the gamma with ramp
The texture with the gamma altered through ramp

The texture in black and white and inverted
It is obviously possible to assign different colors to obtain lysergic effects…
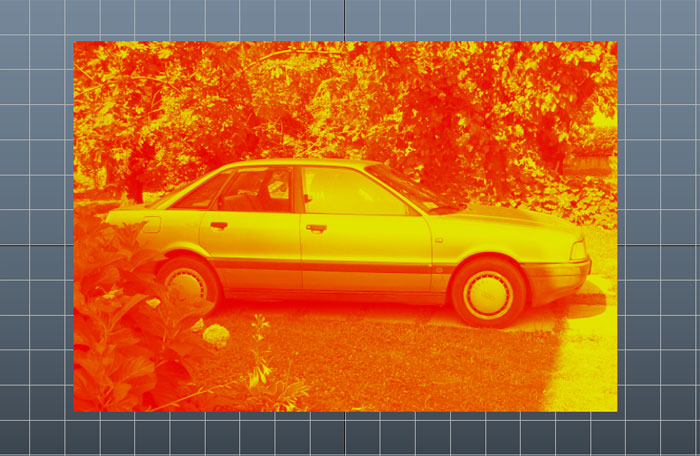
Our texture with eccentric colors
A practical use of this method is to rapidly obtain black and white versions of a diffuse map in order to make versions to use as reflection maps or glossiness maps by changing gamma and contrast values.
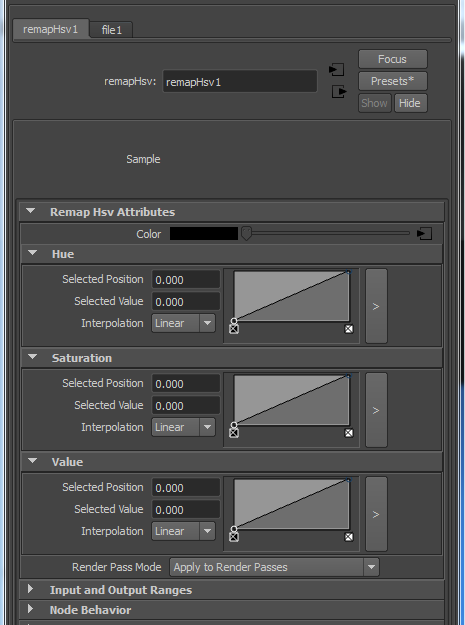
3. Hsv Remap
Remap Hsv is very similar to Photoshop's Hue/Saturation/Lightness controls but it features a couple more controls that make it extremely powerful.
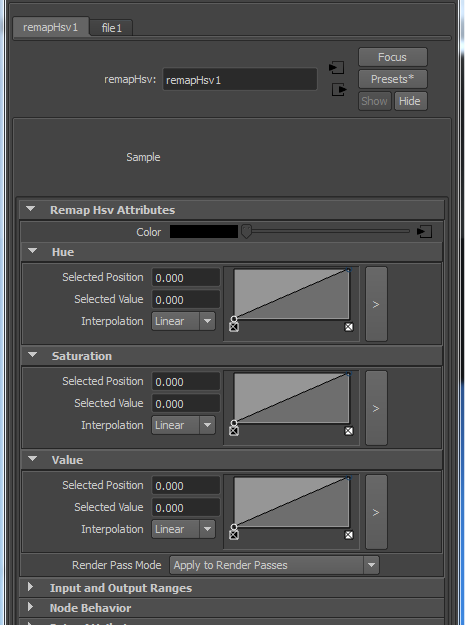
The remap Hsv node in the attribute editor
The main difference is that we have curves instead of sliders.
With the Hue curve, if we raise the point on the left the colors shift to the right of the color spectrum (green > blue > violet > red).
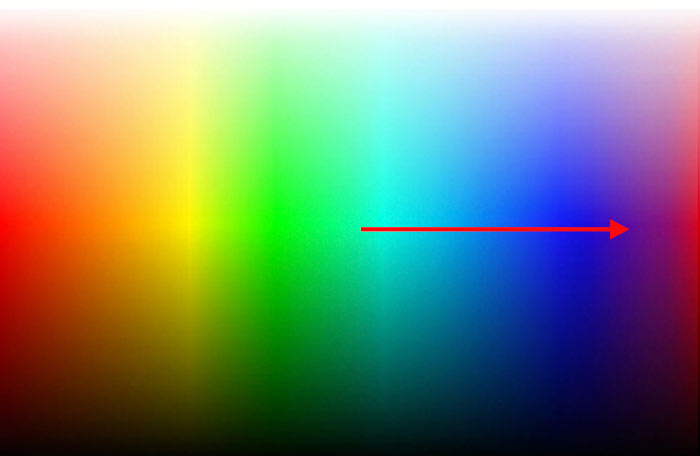
The tone moves to the right of the color spectrum
Lowering the right point instead, the colors will shift in the opposite direction (green > yellow > red)
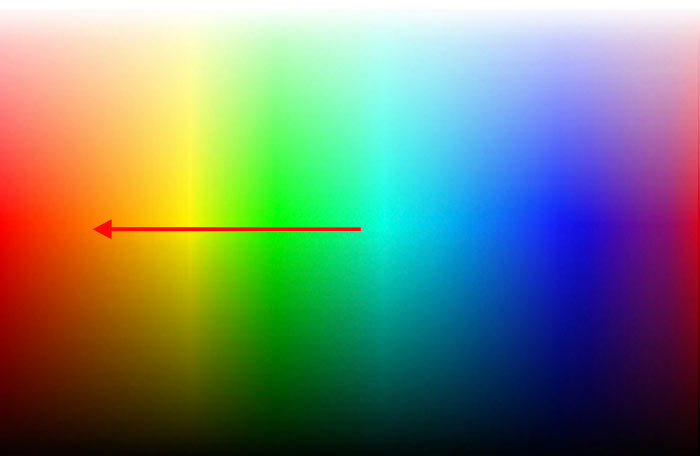
The tone moves to the left of the color spectrum
To raise the saturation of the image we use the left point of the saturation curve, to lower it we have to lower the point on the right.
The last curve, Value, lets us control the luminance of the image. The point on the left lets us raise the luminance and the point on the right lets us lower it.
However the most effective way to use it in my opinion is to pretend it is Photoshop's Curves control, creating new intermediate points.
Some examples of the typical use cases:
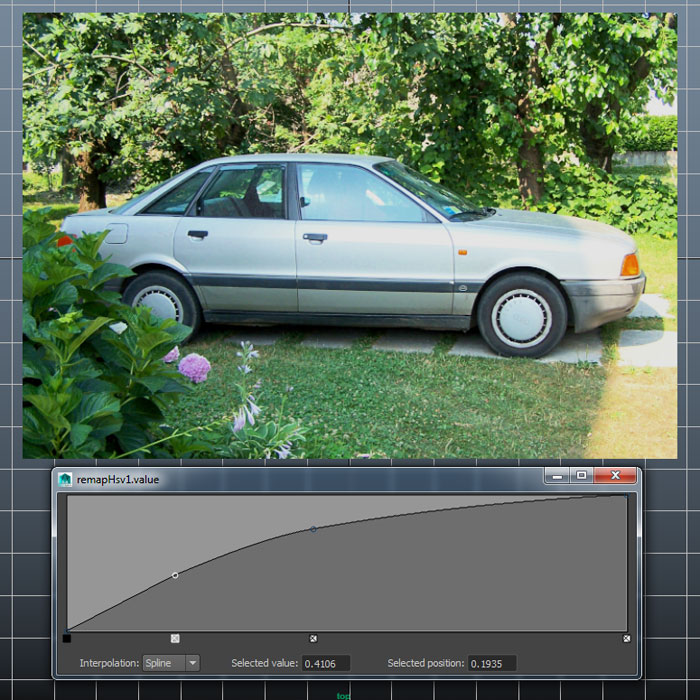
The texture gets lighter if you raise the central part of the curve

The texture gets darker if you lower the central part of the curve
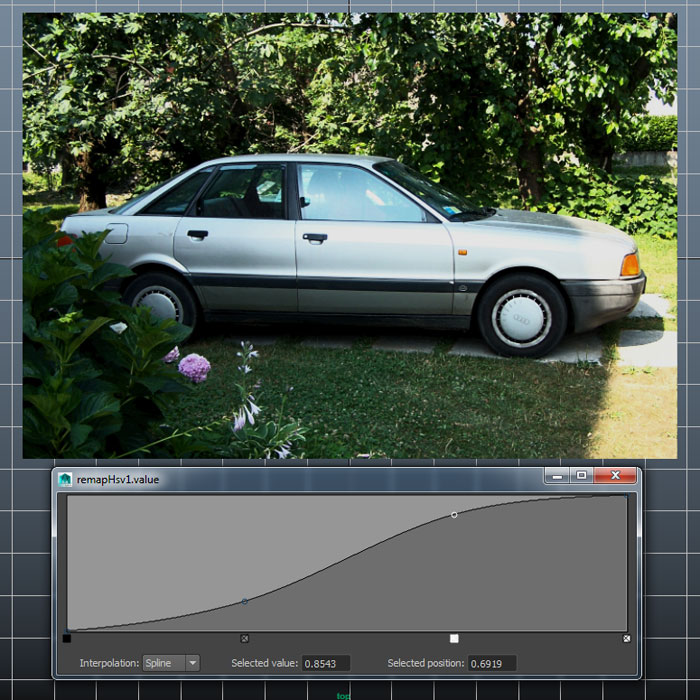
To give more contrast to the texture use an S shaped curve
Obviously having curves instead of simple sliders allows us to add other points to modify specific areas of the image, not only for the Value attribute but also for Hue and Saturation.
4. Remap Value
The Remap Value node in the attribute editor
This node is very similar to the last one but it only has the luminance controls. The main difference is that the input is not outColor, like in remapHsv, but outAlpha. This means that this node is to be preferred when you want to alter the luminance of greyscale textures used for Specular or Glossiness, textures in which value counts not the color.
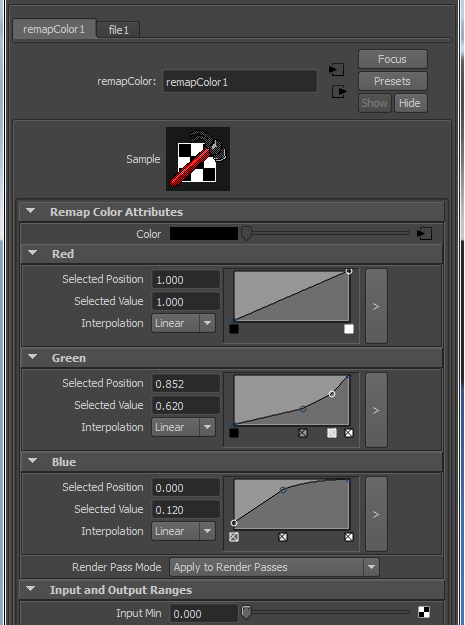
5. Remap Color
It allows us to edit the single RGB channels through manipulation of curves.
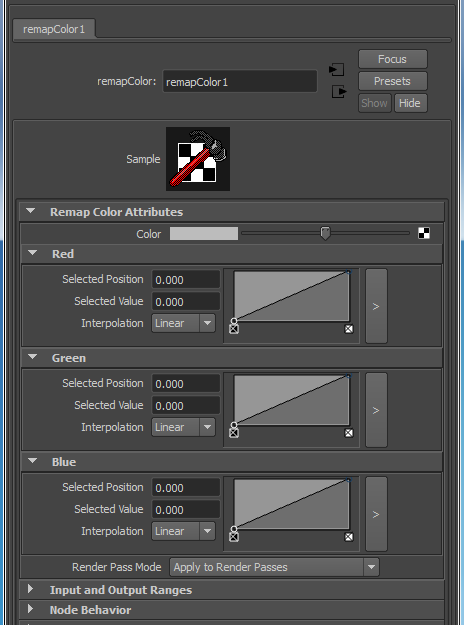
The Remap Color node in the attribute editor
Each curve remaps its channel. The point on the left controls the darker points, the one on the right the lighter points of the image.
The easiest way to work with this tool is to use it as Photoshop's Curve tool in the single channel mode.
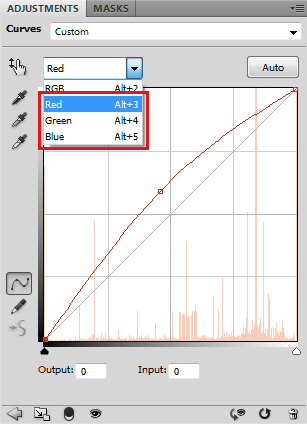
Those familiar whit Photoshop can think of this tool like Photoshop's Curve tool in sigle channel mode
It is particularly useful to rapidly grade our textures. Personally I use it when I want to apply certain color effects to my images or to add a hue to the blacks, as you can see in the image below.
The settings of the curves to obtain the grading of the texture

Example of texture grading by Remap Color
As you can see the color correction tools in Maya are many and very powerful.
I hope that you find this article interesting and that it helps in your work.
Cheers.